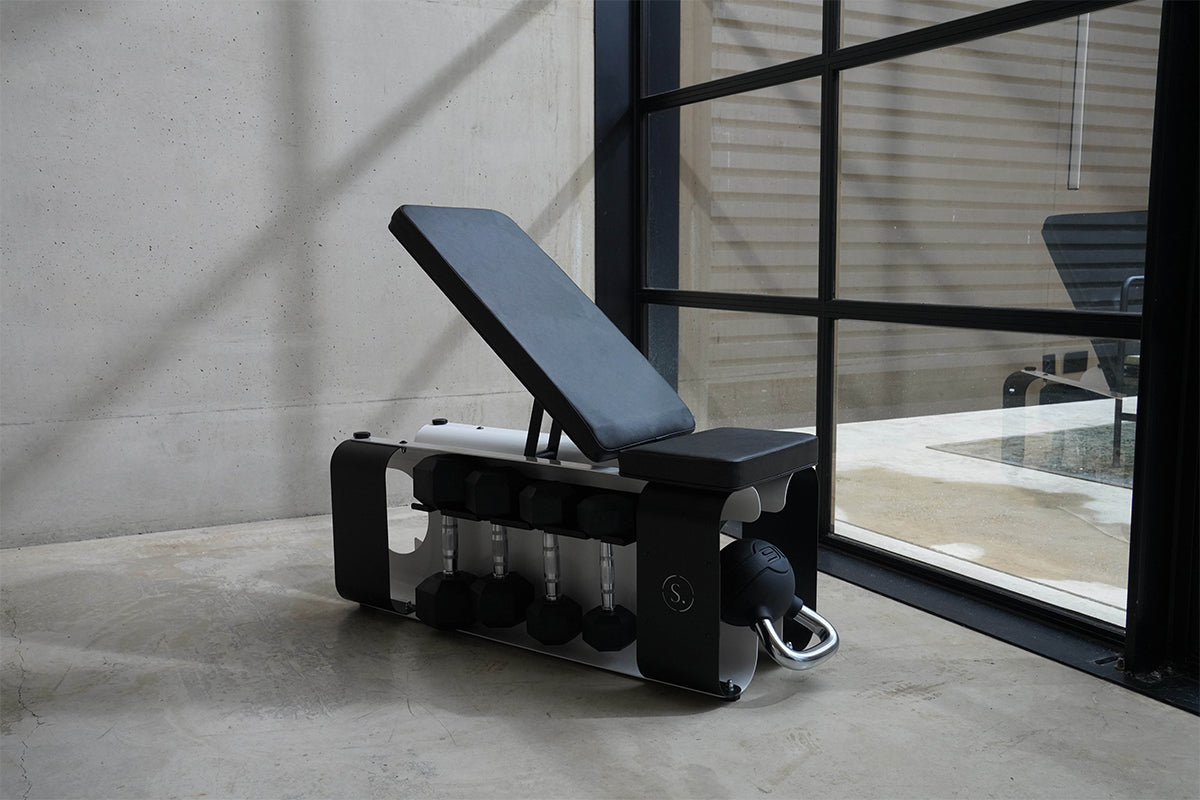
If you have ordered a Solo Signature Bench and Wheels & Handle, please follow the steps below to install these on your bench.
Important Notes:
- Attach the handle at the end you sit on.
- Attach the wheels at the end your head rests at.
- Attach the wheels inside the bench, not on the underside.
Attaching the Handle to the Solo Signature Bench
- Using a 8mm Allen Key, remove the four bolts from the underside of the seat pad. These go through both sides of the bench then the seat pad.
- Position the handle with the holes over the series of holes you have just removed the bolts from.
- Replace the four bolts (with the ones you just removed), one at a time. You may need to apply pressure to the side panels, or reposition the bench to ensure all elements are in-line. (the handle, side panels x 2 and eventually the seat pad).
- (Adjustable Bench only) test the backrest in an incline position to ensure the seatpad has been repositioned correctly and the pads do not clash.
Attaching the Wheels to the Solo Signature Bench
- Remove the dome head nuts (x4) and washers (x4) from the thread of the rubber feet at the base of the bench and the fastener that sits behind this.
- Keep the foot in place - you will reuse this. But swap the rear short M8x16mm fastener for the longer M8x20mm one provided in the blister pack.
- The longest M8x25mm replacement fastener is not required on this product.
- Position the two wheel assemblies so the threads now go through the holes on the wheel bracket as well.
- Replace the washers, then tighten the dome head nuts to secure the wheels in place.
- Lift the bench from the opposite end to ensure the wheels work correctly once they have been installed. The wheels should only come into contact with the ground once the bench has been lifted from the opposite side.
If you have any issues at all, you can reach our product team on 01704 338 849 then option 3, they'll be happy to talk you through anything.